By Chris Coyier
While we do our best to give our users a lot of smart defaults to help their forms looks great right from the start, we know some users like to dress things up a bit. In fact, we encourage our users to customize their forms using our Theme Designer so they can match the look and feel of their site’s branding. The Theme Designer can easily adjust the logo, background, typography and borders of your forms without writing any code on your end.
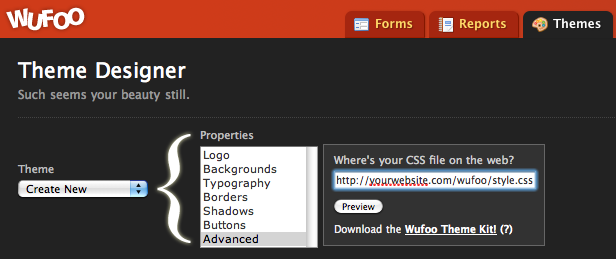
However, if you have some swagger and a little CSS knowledge under your belt, you can take your form’s looks to the next level using the Advanced settings for your custom theme, which allows you to link out to a stylesheet anywhere on the web. This Custom CSS feature can allow you to do things like adding rounded corners and changing the spacing and dimensions of your form elements.
Video of Custom CSS in Action
To show you how this all works, we made a quick video for you to watch to see how you can use these features on your forms to give you the look you want.
Now we’re talking control!
Anatomy of a Wufoo Form
In order to make the most out of our Custom CSS feature, it’s best if you use the same CSS selectors that the Wufoo default stylesheet uses, so you can strategically override them with your own styles. One question that comes up often when you start down this journey is how do you know which selectors to use in your stylesheet?To better help our users who are fighting the good fight, we created a big ol’ chart (big enough to print and hang on your wall!) to help you identify the exact HTML markup (elements, IDs, and classes) for any particular part of a Wufoo form:
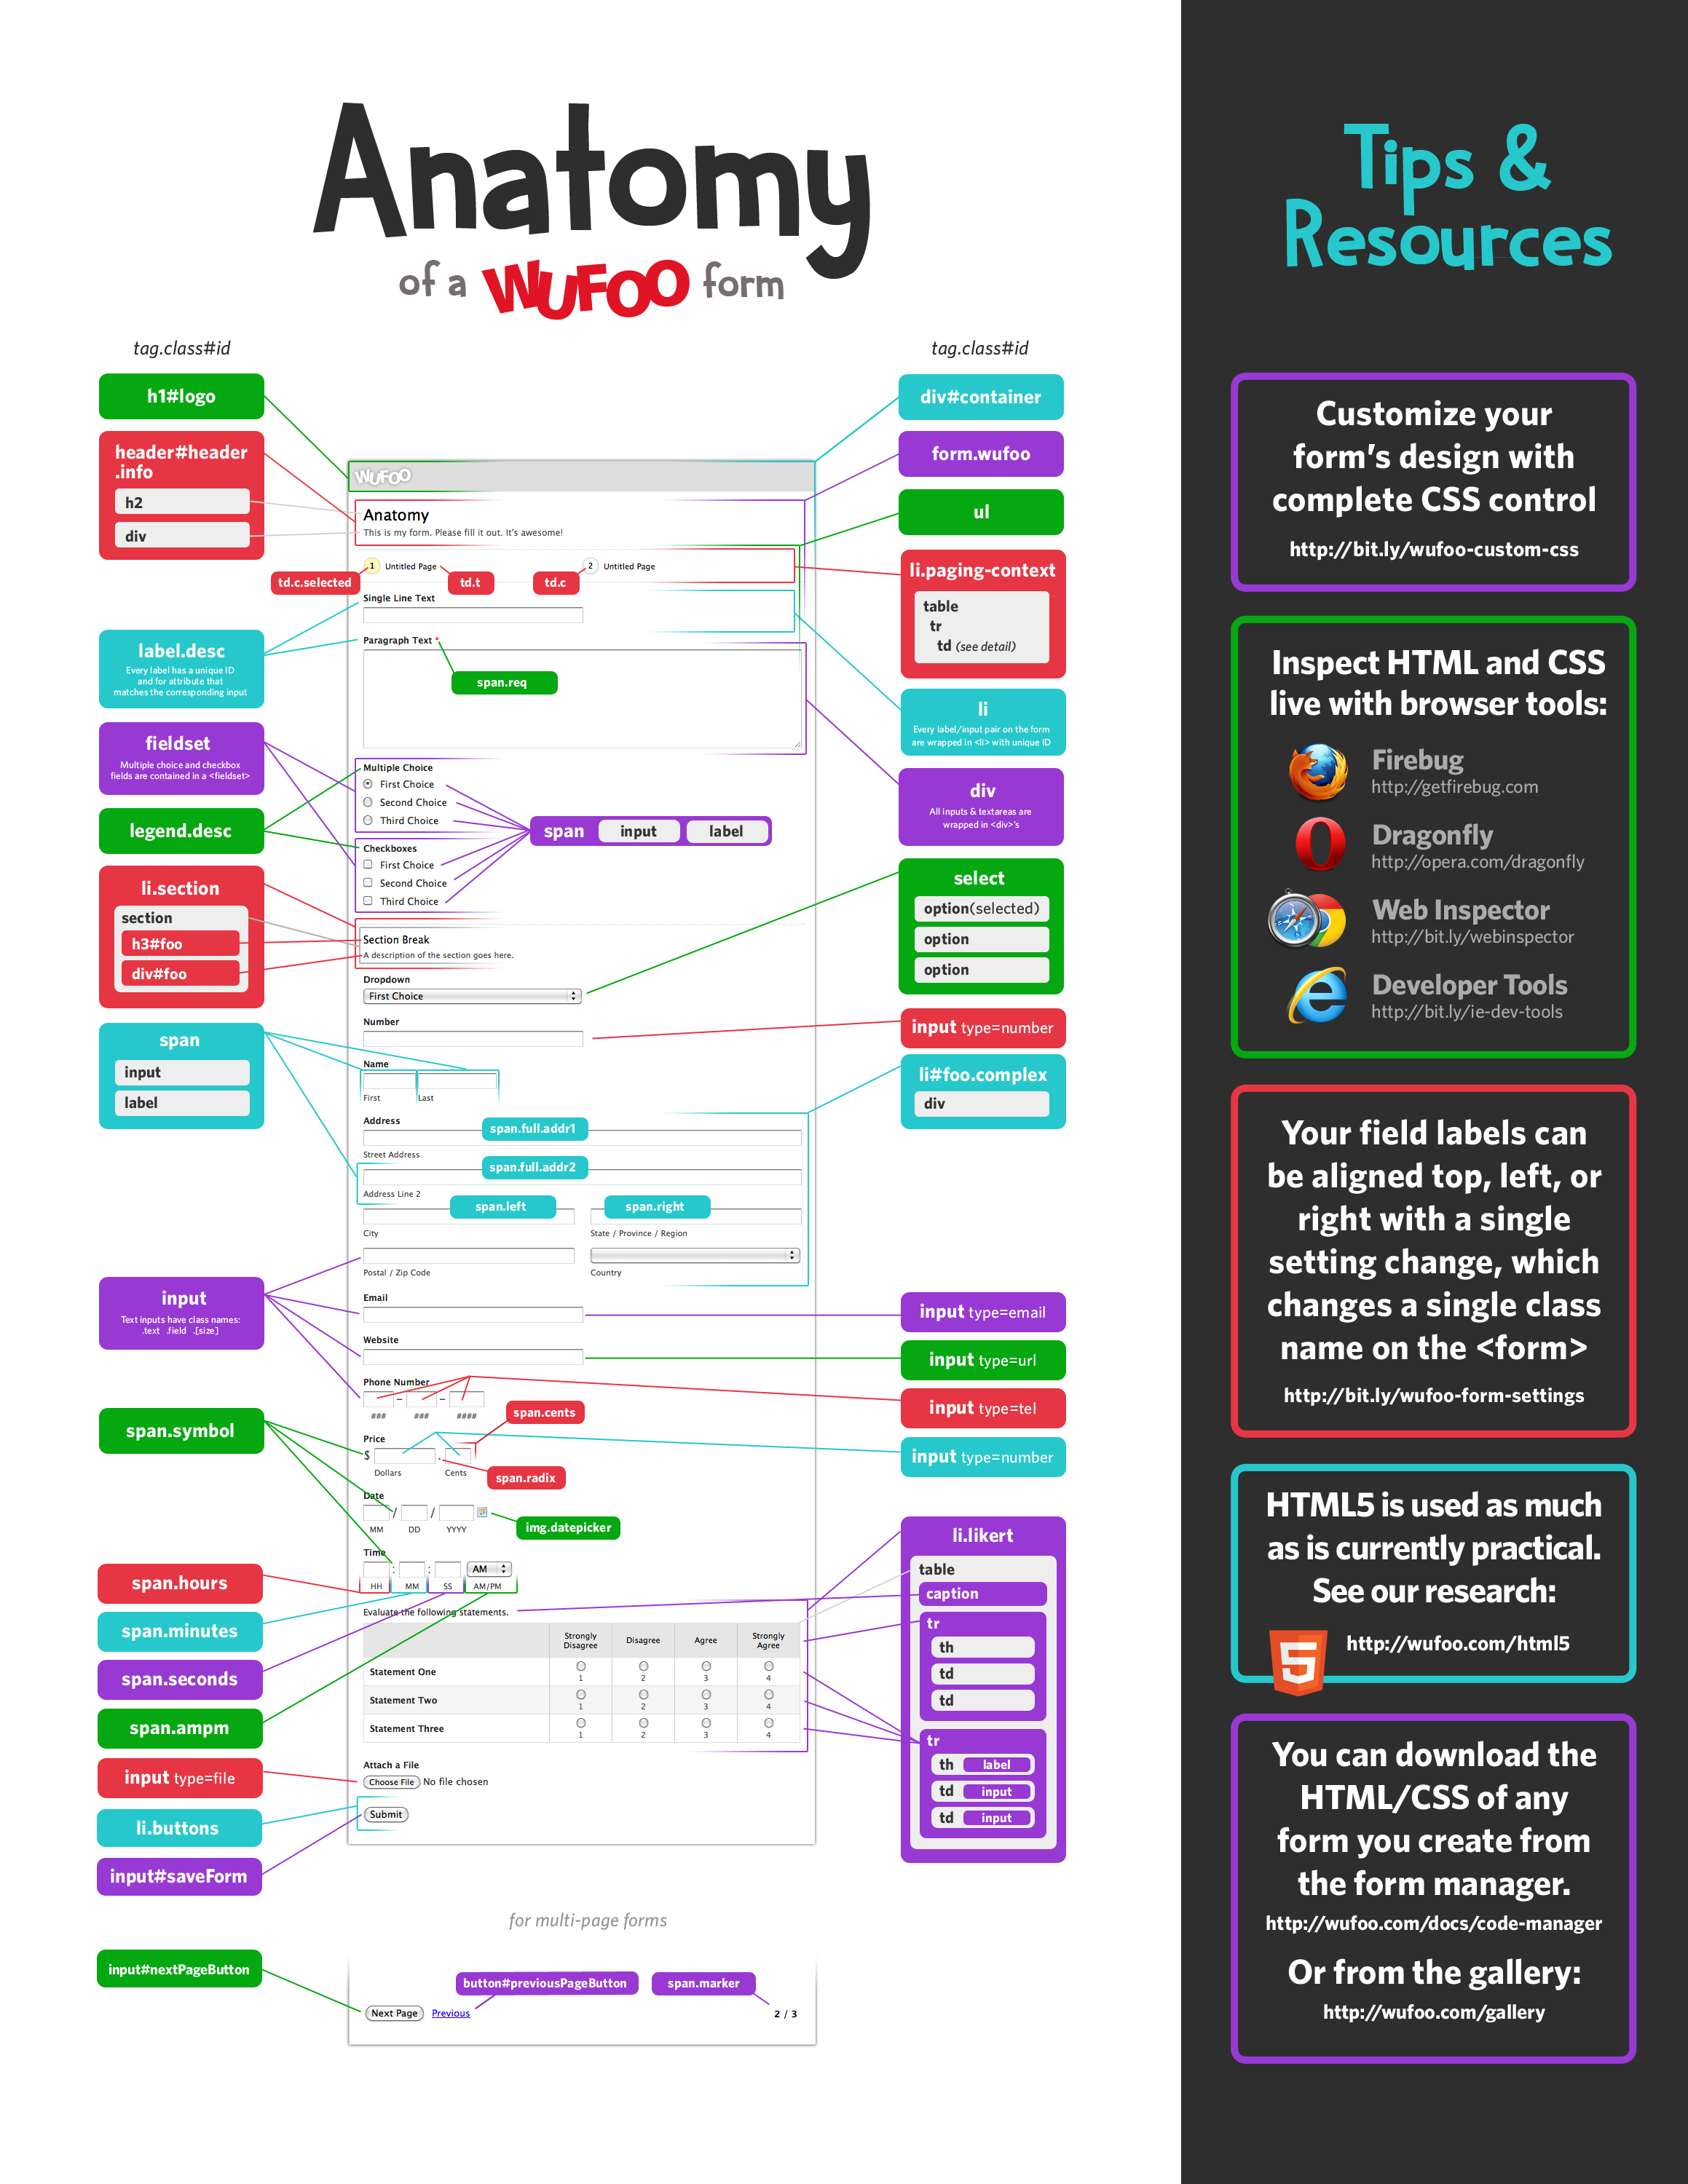 Click to View Big
Additionally, you can also use a DOM inspection tool to see the exact CSS affecting certain elements, then copy that selector. What is a DOM inspection tool? They are all free tools, but what you use depends on your browser. Here’s the lowdown:
- Firefox = Firebug (extension)
- Safari & Chrome = Web Inspector (built in)
- Opera = Dragonfly
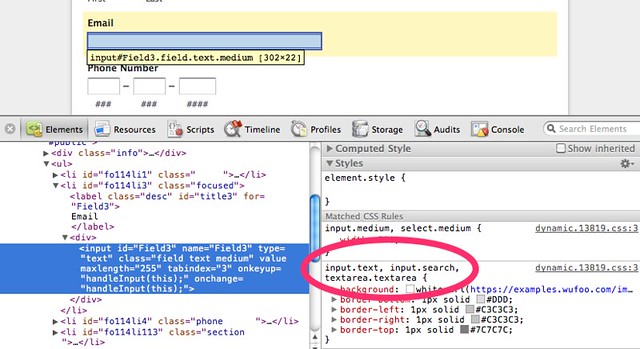
With these tools, the trick is to right-click on an element and choose “Inspect Element”.

Here’s an Example!
Let’s say our goal is to add rounded corners to all our inputs and textareas. Above we right-clicked on the input element and inspected it. Now a pane will open on the bottom of our browser window which shows the DOM (looks like the HTML) on the left and all the CSS rules affecting that element on the right. We can quickly see a CSS rule that is handling the border styling.
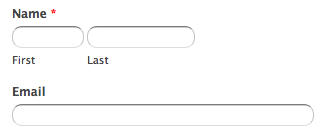
So with our goal of rounding the corners of our inputs and textareas, let’s use that exact same selector and add the rounded corners with CSS3. This is what you would add to your custom stylesheet:
input.text, input.search, textarea.textarea {
-webkit-border-radius: 10px;
-moz-border-radius: 10px;
border-radius: 10px;
}
Yay!
Share!
Our favorite thing ever is seeing beautifully customized forms, so if you’ve used this feature to do that, hit us with some links in the comments.