In this article
- Add a Field
- Field Settings
- Form Settings
Wufoo
Building a Form
In this article
- Add a Field
- Field Settings
- Form Settings
The form builder is the place where you can add fields to your form, adjust the settings for each field, and configure some form-wide settings.
To access the Form Builder:
- Log in and go to Forms.
- Click +Add Form in the upper-right corner to create a new form, or click the form you want to edit.
Add a Field
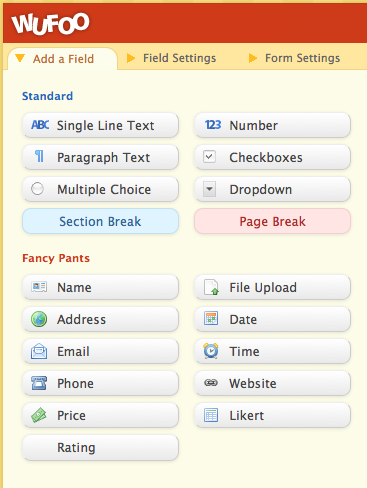
Fields are the building blocks of forms—they let you collect data from the people who fill out your form. Learn about all the field types you can add to your form so you can collect the right kind of data, in the right format.
Learn more:
Field Settings
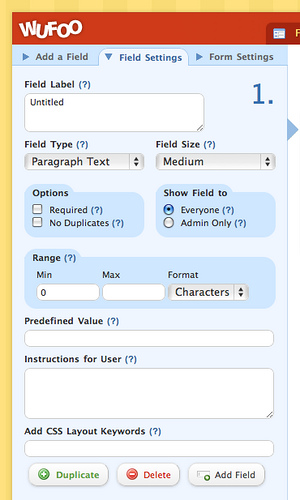
Field Settings are settings that you can apply to an individual field on your form—they control all sorts of things like validation, format, visibility, encryption, field size, layout and requirements for filling out the field correctly.
Learn more: Field Settings
Form Settings
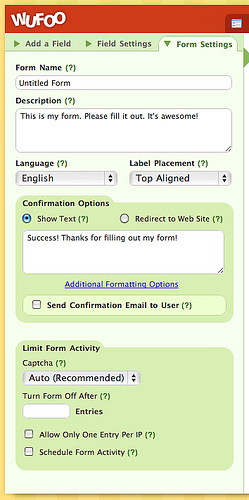
The Form Settings tab is where you can edit properties that apply to your entire form, set up confirmation options to customize what happens when people complete your form, and set limits and restrictions on form activity.
Learn more: Form Settings
Learn more: Building your form is just the beginning. Check out our video tutorial series to learn more about all the other areas of Wufoo—like adding logic, designing a theme, setting up email notifications, and viewing entries: Getting Started with Wufoo